
- Home
-
Tour ▼
- Project Management
- Ticketing System
- Time Tracking
- CRM
- Asset Management
- Field Service Management
- Employee Monitoring
- Productivity Suite
- Expense Tracker
- Event Management
- Hiring
- Billing And Invoicing
- Performance Review
- Leave Management
- Industries ▼
-
Lets Compare ▼
- 10to8
- 17hats
- Abacus
- Accelevents
- Accelo
- ActiveCollab
- Acuity Scheduling
- ADP TotalSource
- Agile CRM
- AI Field Management
- ApplicantStack
- Appointeze
- Appointlet
- Appointy
- Asset Panda
- AssetTiger
- Asset Infinity
- Autotask
- Avaza
- Awork
- BambooHR
- Basecamp
- Big Biller
- BigTime
- Birdview
- Bitrix24
- BiznusSoft
- Bizzabo
- Bonusly
- Bookeo
- Booksy
- Bookwhen
- Box
- BQE
- Breeze
- Bryq
- Bullhorn
- CalendarSpots
- Capsule CRM
- Ceipal
- Certify
- Cheqroom
- Clarizen
- ClearPathGPS
- ClickUp
- Clio
- Clockodo
- Close
- Commusoft
- Concur
- Confluence
- ConnectWise
- CONREGO
- Corpay
- Darwinbox
- DeskTrack
- Dext
- Docuware
- Doodle
- Dovico
- DreamzCMMS
- Dropbox Business
- eFileCabinet
- Egnyte
- eMaint
- Epicor
- EventBrite
- Eventcombo
- EventMobi
- Eventsair
- Eventzilla
- ExpensePath
- ExpensePoint
- Expensify
- EZ Office Inventory
- EZO
- FactorialHR
- FieldEdge
- FieldPulse
- Fiix
- FreshBook
- Freshdesk
- Freshservice
- Freshteam
- Freshworks
- Front
- Furious Squad
- GigaBook
- GigaTrak
- Global Shop Solutions
- GoCodes
- GoFMX
- GoodDay
- Google Drive
- Gusto
- Hardcat
- Halogen Software
- Heeros
- Hive
- Housecall Pro
- HubSpot
- Idrive
- Infraspeak
- InLoox
- Insightly
- InvGate
- Invoicera
- Invoice2go
- Ivanti
- Jane App
- JazzHR
- Jira
- Jobber
- Joblogic
- Jumpshare
- Kantata
- Keap
- Keka
- Kickserv
- Koofr
- Lansweeper
- Limble CMMS
- Livetecs
- Mega
- Microsoft Planner
- Motivosity
- NetSuite
- Nextcloud
- Nextiva
- Nimble
- Odoo
- Okappy
- OrangeHRM
- OnceHub
- OneDrive
- Opendrive
- Paymo
- Pcloud
- Performance Pro
- Pheedloop
- Picktime
- Pipedrive CRM
- Pipefy
- Planning Pod
- Pleo
- Podio
- Pro Workflow
- PurelyHR
- QuickBooks
- Rainfocus
- Ravetree
- Razonsync
- Recruiterflow
- Reftab
- Replicon
- RescueTime
- Rippling
- Rocket Matter
- Rydoo
- Saba Talent
- Sage HR
- Salesforce
- Samepage
- Schedulista
- Scoro
- Service Cloud Software
- Service Fusion
- ServiceNow
- ServiceSight
- Service Trade Commercial
- Setmore
- Sharefile
- SharePoint
- Signinapp
- SimplyBook
- SnapAppointments
- Snipe-IT
- SolarWinds
- Square Appointments
- Stackfield
- Stampli
- STEL Order
- SugarCRM
- SuiteCRM
- SuperSaaS
- Swoogo Events
- Sync
- SyncStream
- Taiga
- Teamgantt
- Teamtailor
- Teamwork
- Time Doctor
- TimeTap
- Tipalti
- Toggl
- Trafft
- Tresorit
- TriNet
- UKG
- UpKeep
- Upland
- Vagaro
- vCita
- vfairs
- Vonage
- Vtiger
- Wasp Barcode
- Webexpenses
- WebHR
- Whova
- Workable
- WORKetc
- Workiz
- Workstatus
- Wrike
- Xero
- XING Events
- YouCanBook
- Zendesk
- Zoho CRM
- Zoho Expense
- Zoho People
- Zoho Projects
- Zoho Recruit
- Zoho Workdrive
- Downloads
- About Us
- Contact
- Blog

- Try for Free
- Pricing & Sign Up
- Live Demo
-

Knowledge Based Article
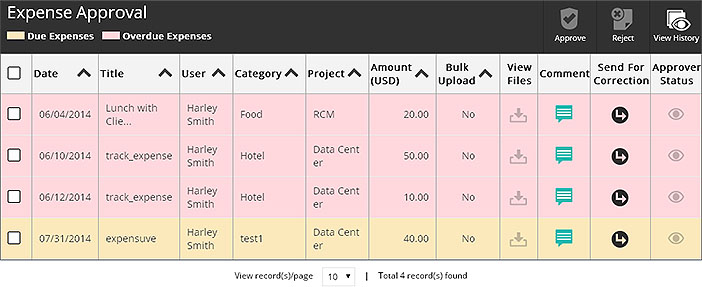
Expense Approval
In this section, the assigned approvers can approve or reject the expenses. To approve the expense, follow the below given steps.
1. Go to Full Menu > Approval > Expense Approval
2. Reject: To Reject the expense entry, checkmark the entry in listing, click on Reject icon and enter the comment.
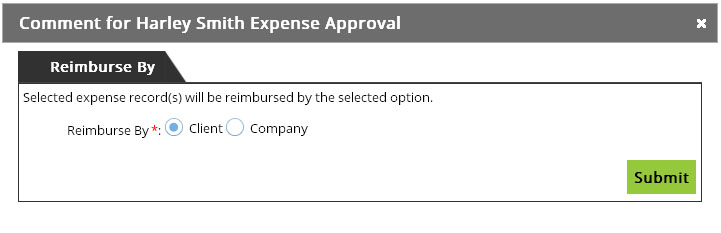
3. Approve: To approve the expense entry, checkmark the entry in listing and click on Approve icon. Enter the comment and mention if Reimburse by ‘Client or company’.
4. History: To view history of the expense entry, checkmark the entry in listing and click on View History icon.
5. Send for Correction: Click on the Send for Correction icon of the particular expense entry, to send it back to the user for corrections.
6. View Files: To view attached files, click on View Files icon of the particular expense entry.
7. Click ‘Save’ to make changes.
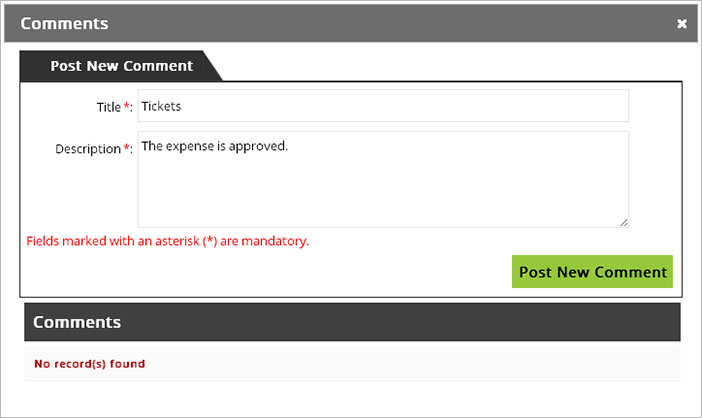
8. Comment: To add comment to the expense entry, click on the Comment button of the particular entry. Enter the comment and click on Post New Comment.
Plans
Request For Demo Buy NowSocial Links

Office Address
Tour
- Project Management
- Ticketing System
- Time Tracking
- CRM
- Asset Management
- Field Service Management
- Event Management
- Expense Tracker
- Hiring
- Billing and Invoicing
- Appointments Calendar
- Performance Review
- Leave Management
- Screenshot Tracking
- Unified Communication
- Resource Scheduling
- Knowledge Base
- Personalized Dashboard
- Report
- Employee Management
- Client Portal
- Cloud Storage
- Approval Rules & Auditing
- Utility-Billing-Software
- Employee Monitoring
- Productivity Suite
- 3rd Party Integration
- Organization Chart
Other Links
- Pricing & Sign Up
- Testimonials
- Integration
- More Resources
- Recruitment Software
- Online Invoicing Software
- Remote Work Monitoring
- Expense Tracking Software
- FSM Software for Healthcare
- Field Service Management Software
- FSM Software
- Talygen IT Asset Management Software
- Project Management Software For Construction
- IT Asset Management Solutions
- FSM Software For Small Business
- Online Invoicing Software Guide For Small Businesses
- Project Management Software For Construction
- It Infrastructure Managed Services
Support Pages
-
 Rated
4.95/5.0
by
325+
Reviews
Rated
4.95/5.0
by
325+
Reviews